Modify Date - Documentation
1. Installation
First, you must download the latest version of the plugin.
To install the extension, simply access your Joomla administrator panel and open System in the left menu. Then, click on Extensions in the Installation panel.
Open the tab Upload package file, click on the green button and locate the ZIP archive plg_modify_date.zip on your computer. Select it to launch the installation process.
Few seconds later, a message confirm you that the process of installation is successfuly completed.
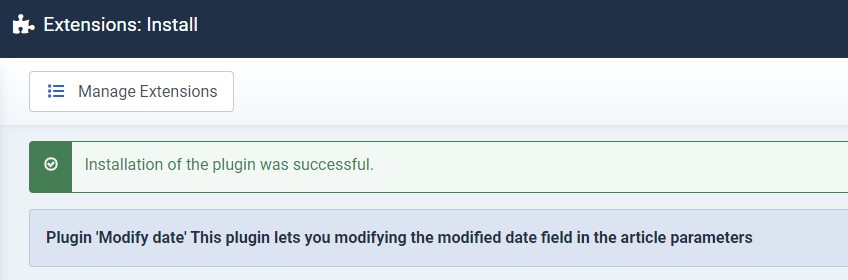
Now, your new Joomla 4 plugin Modify Date is available in your Plugin manager.
2. Setup
To be able to edit the modified date field in the articles parameters, you must first enable the plugin.
In the System Dashboard, click on Plugins in the Manage section.
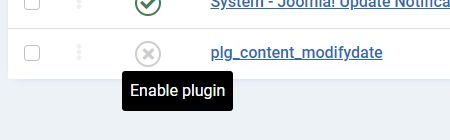
Then, filter to locate Modify Date in the plugins list.
Simply click on the to enable the plugin:
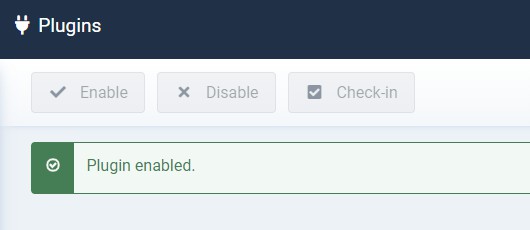
Few seconds later, a message confirms that the plugin Modify Date is enabled:
3. Use case
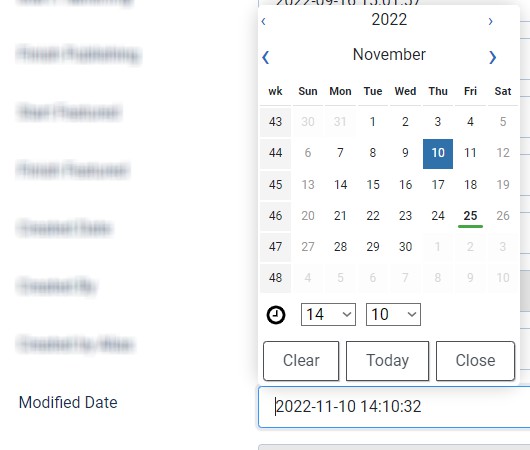
Open any article in your article manager and open the Publishing tab.
Now, you can edit the date and the time in this field:
If you have to edit an article only for a typo, you don't necessary want this article up in your blog lists for that reason. The plugin Modify Date was designed for this use case. You can edit the date and the time of your articles.
If you like this free Joomla 4 plugin, you can share your review on the Joomla Extensions Directory with the Community.